
Turn on store tracking
Tracking works from the moment you install. This step is optional and makes it more accurate: more accurate visit tracking, and better matching of orders to your ads. All you do is switch on one toggle in your theme.
Before you start
- The app is installed and the connect page in Flowfy shows Connected. If not, see Install the app from the link.
- A login to your Shopify admin that can edit themes.
Turn on store tracking
1. Open the theme editor
Right after the install, you get an email with a one-click link. It opens the Shopify theme editor straight on the Flowfy embed.
You find the same button in Flowfy, both inside your Shopify admin and in the Flowfy dashboard: Turn on store tracking.
2. Switch it on
In the side panel of the theme editor, check that the toggle is on. These are the names you see in Shopify:
| What you look for | Name in Shopify |
|---|---|
| The side panel | App embeds |
| The toggle, admin in English | Storefront tracking |
| The toggle, admin in Arabic | تتبع المتجر |
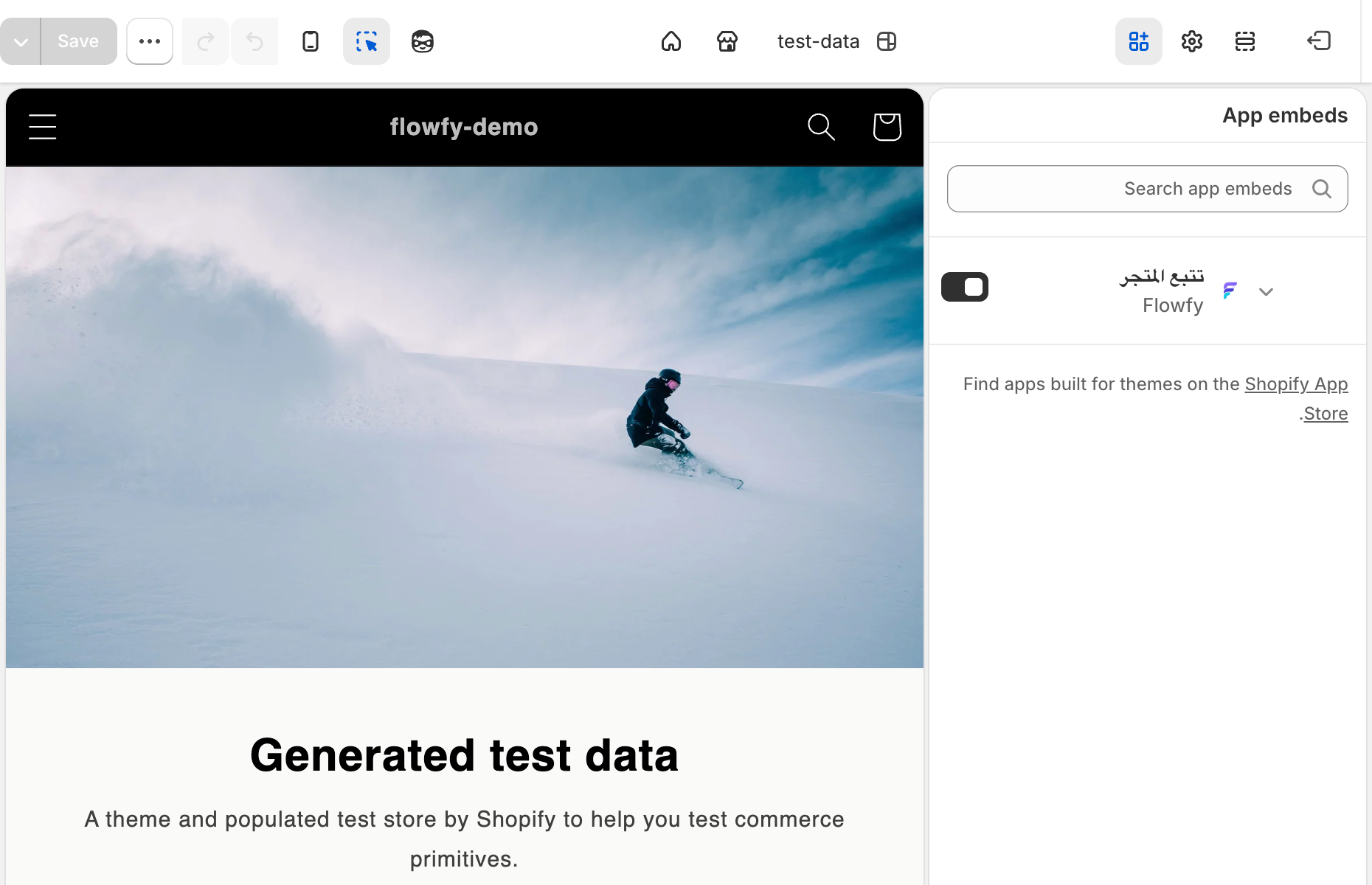
3. Save
Click Save at the top of the theme editor. The toggle does nothing until you save.
If you forget
If no store visits arrive within an hour of the install, we remind you once, and only once.
If something goes wrong
The link or button does not open the theme editor. Open the theme editor from Shopify under Online Store › Themes › Customize, then open the side panel and switch the toggle on.
My store uses more than one theme. Switch it on in the theme your customers see, the one marked as live.
I switched it on and nothing changed. Check that you clicked Save.