
TikTok
Connecting TikTok lets Flowfy send every purchase, add-to-cart and page view from your store straight to TikTok's servers, so TikTok can credit sales to the ads that produced them even when the browser pixel never fires.
There is no Pixel Code to copy and no access token to generate. You sign in to TikTok from inside Flowfy, choose your ad accounts, and pick the pixel each one sends to. Flowfy creates the destination for you.

Watch the TikTok setup walkthrough
Before you start
- A TikTok login with access to your ad accounts in TikTok Ads Manager.
- The owner or an admin role in your Flowfy team. Other roles can see the page but cannot connect accounts or set up tracking.
- A Flowfy source already connected. Flowfy links the new destination to every active source you have. If you have not connected your store yet, start with Getting started.
Part 1 · Connect your TikTok account
1. Open Accounts & tracking
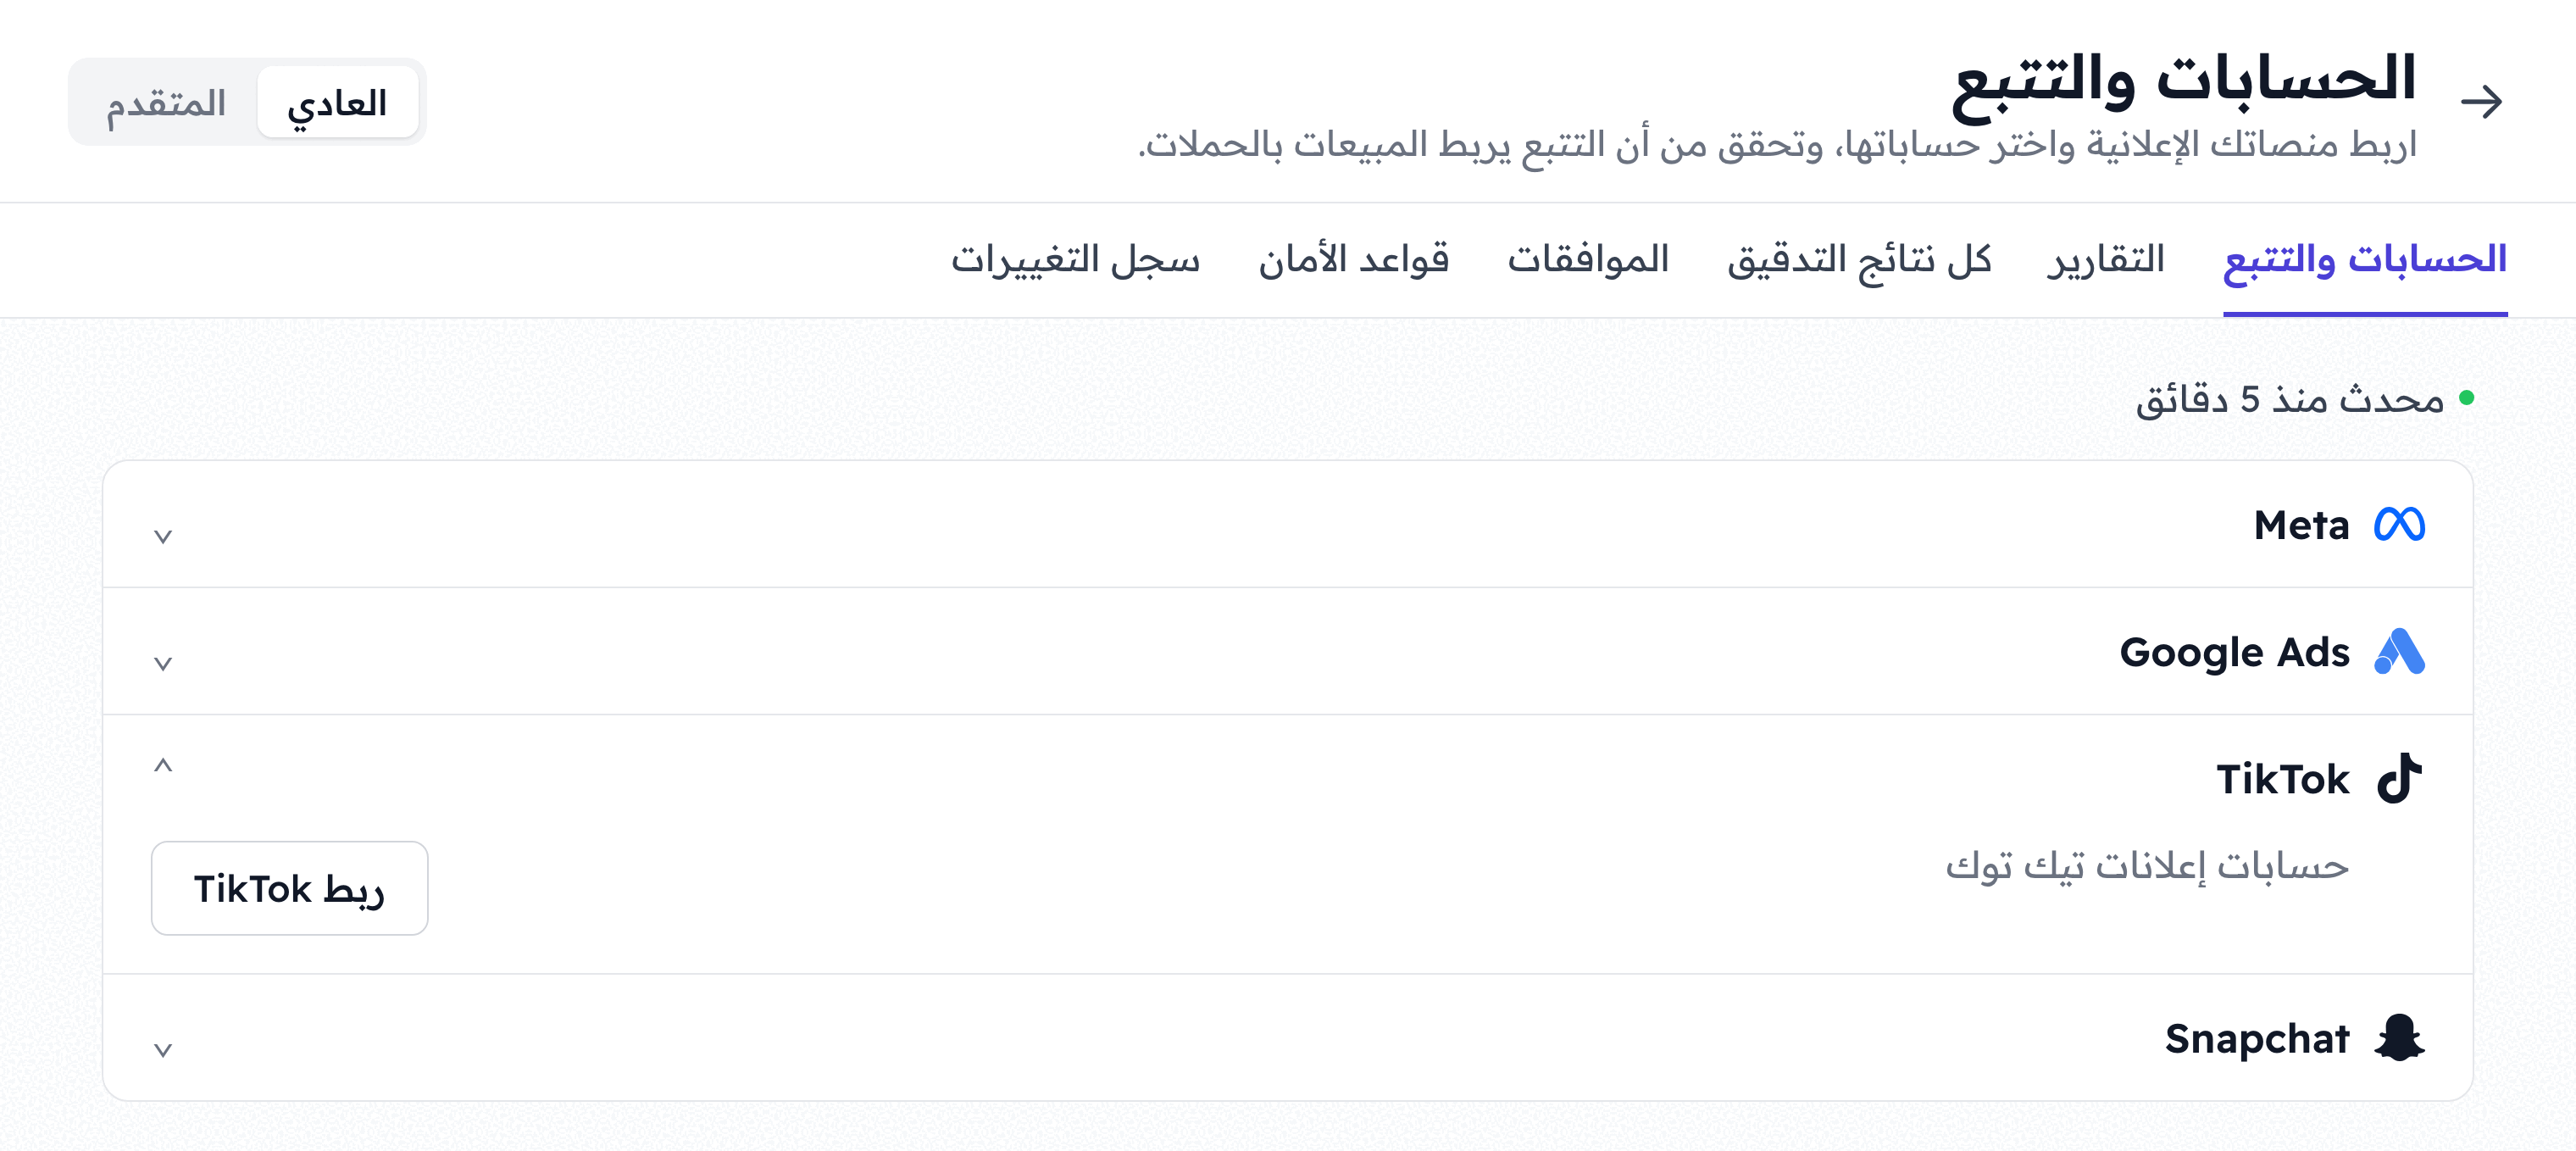
From the sidebar, open Integrations and click Connect a platform. The Accounts & tracking page opens.
Open the TikTok row.
2. Sign in to TikTok
Click Connect TikTok and sign in with the TikTok login that manages your ads. Keep every permission switched on when TikTok asks. Flowfy needs them to send events, and without them the tracking section in Part 2 never appears.
If Flowfy is open inside your store's dashboard, TikTok opens in a new window, and the TikTok row shows Waiting for TikTok… Finish in the window that opened. until you are done. Otherwise the page itself goes to TikTok and comes back to Flowfy when you finish.

3. Choose your ad accounts
Back in Flowfy, the window is titled Choose your ad accounts on TikTok, grouped by Business Center. Tick the ad accounts your campaigns run in and click Save. If your login reaches only one ad account, the title reads Choose your ad account on TikTok instead: click Add account.
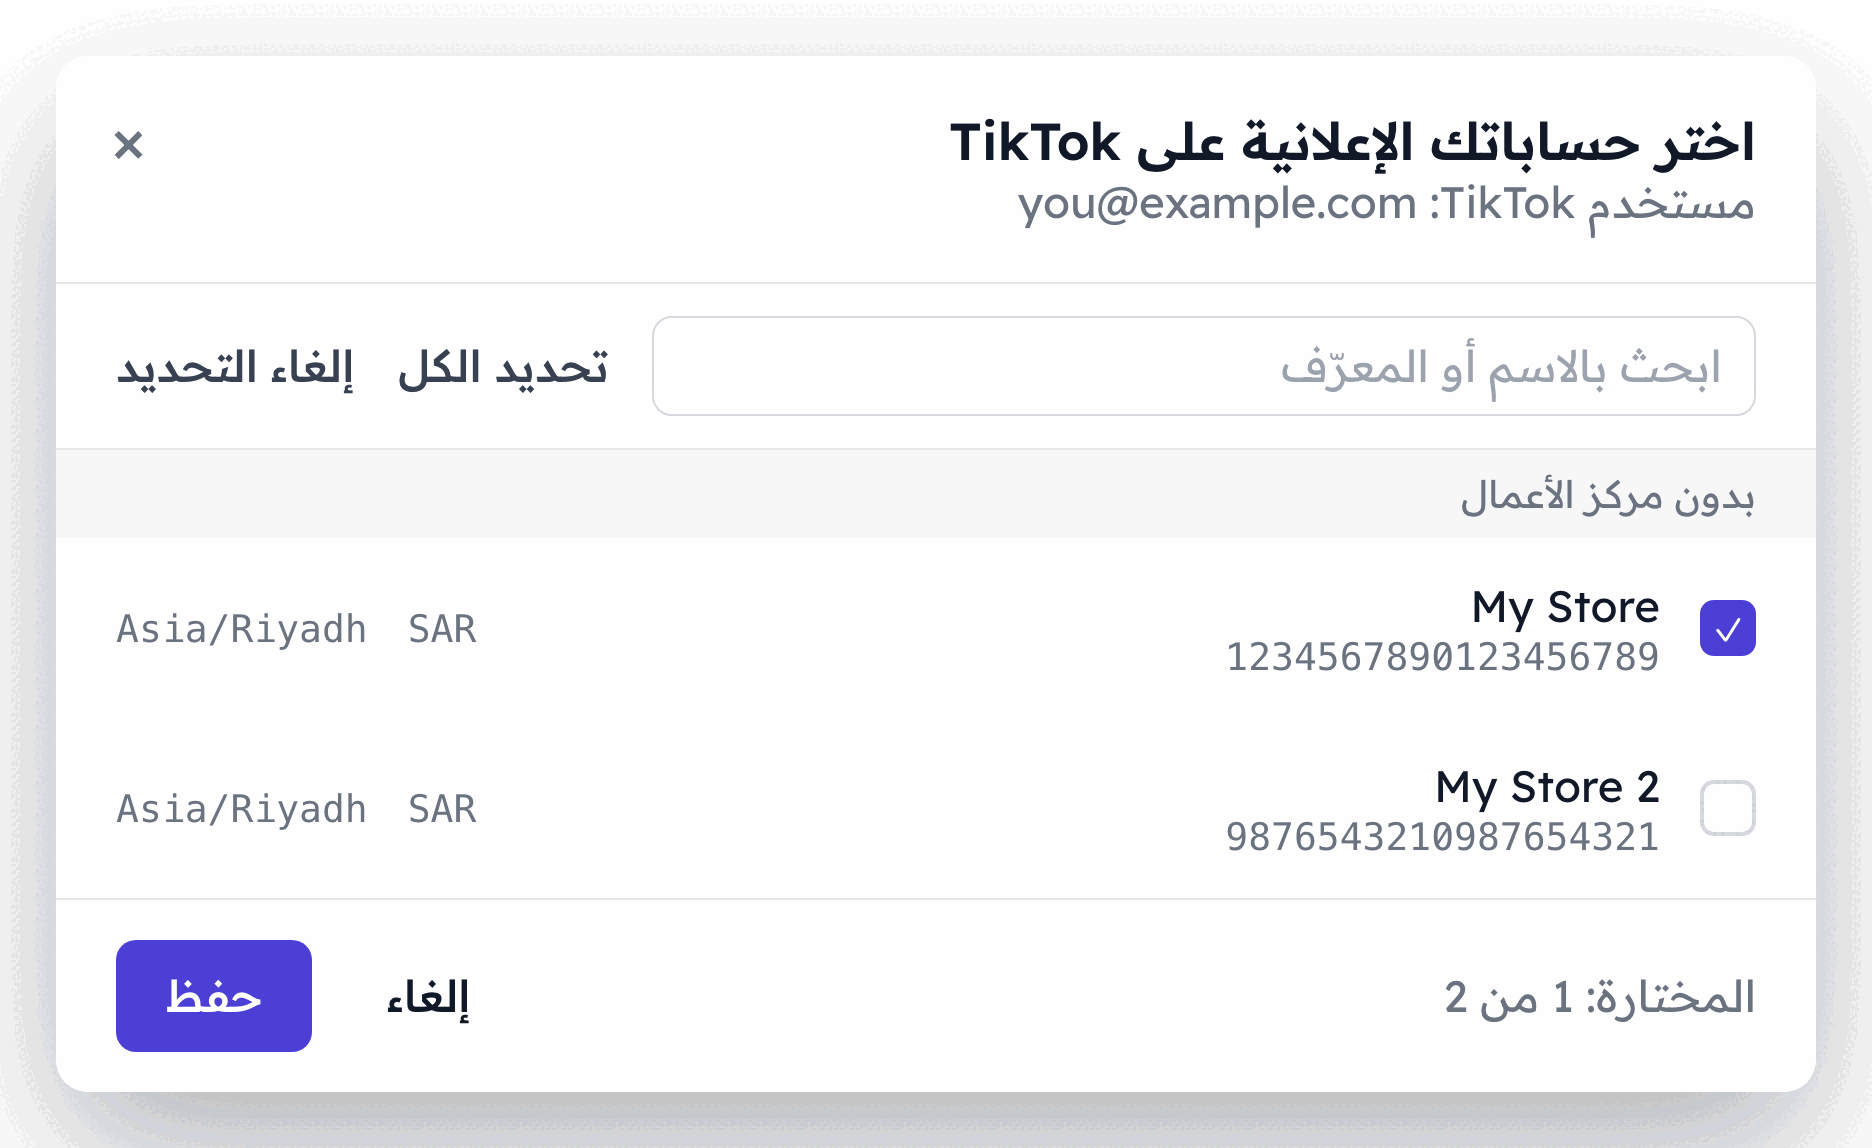
The TikTok row now shows your login, and every chosen account carries a Pixel required badge until you finish Part 2.
Part 2 · Choose the pixel for each account
1. Pick the pixel and enable tracking
Under each ad account, open the Pixel list, choose the pixel your store should send to, and click Enable tracking. Flowfy confirms with Tracking is on for this account.
Choose the pixel your website already reports to. Server events and browser events belong on one pixel, so TikTok can recognise them as a single sale rather than two.
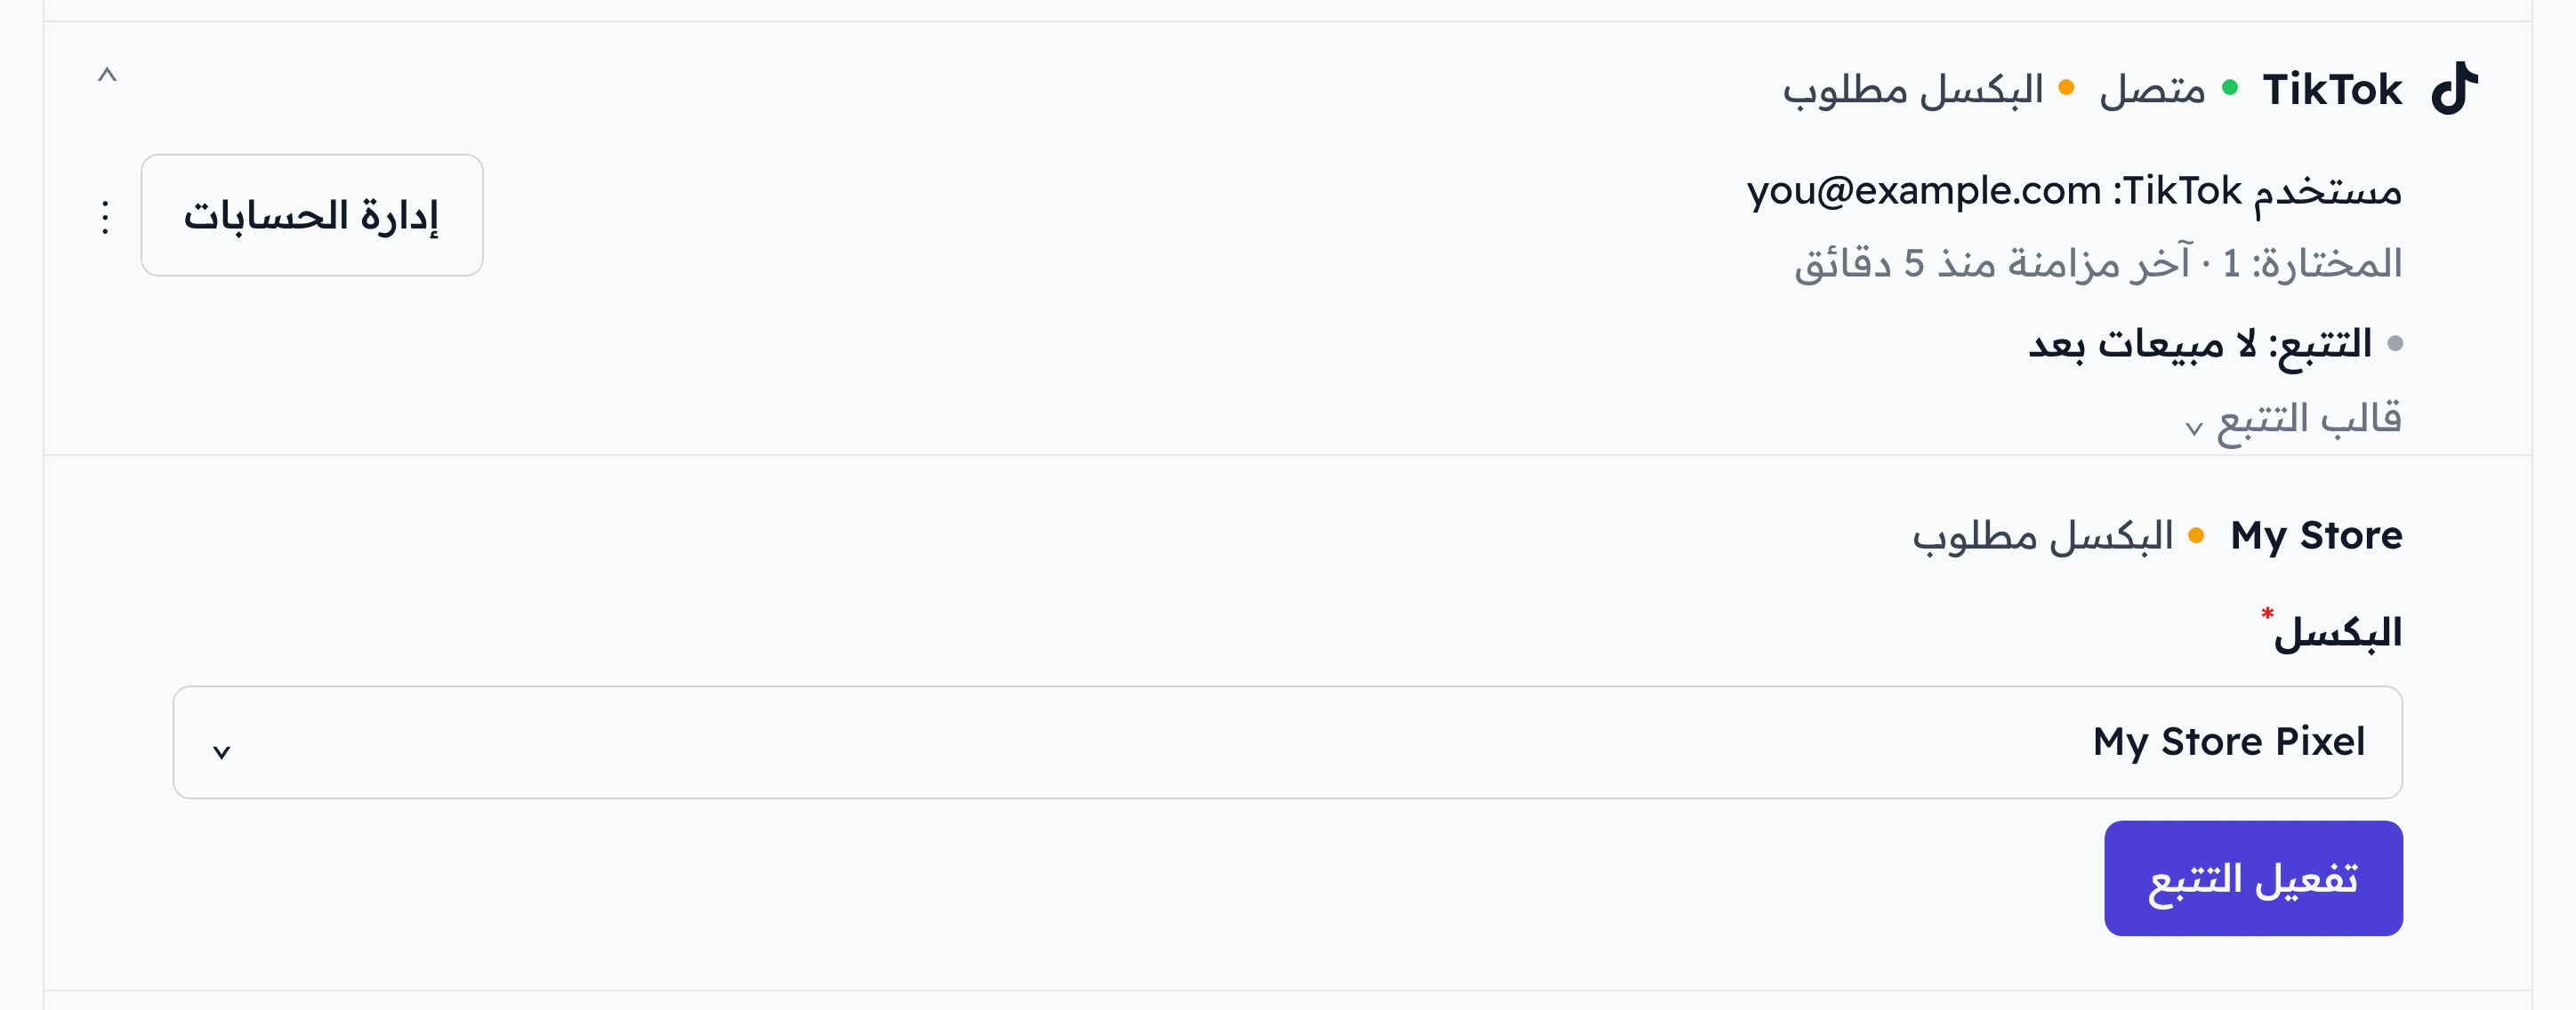
If the ad account has no pixel at all, Flowfy offers to make one: type a name under New pixel name, click Create pixel, then Enable tracking.
2. Add the tracking template to your ads
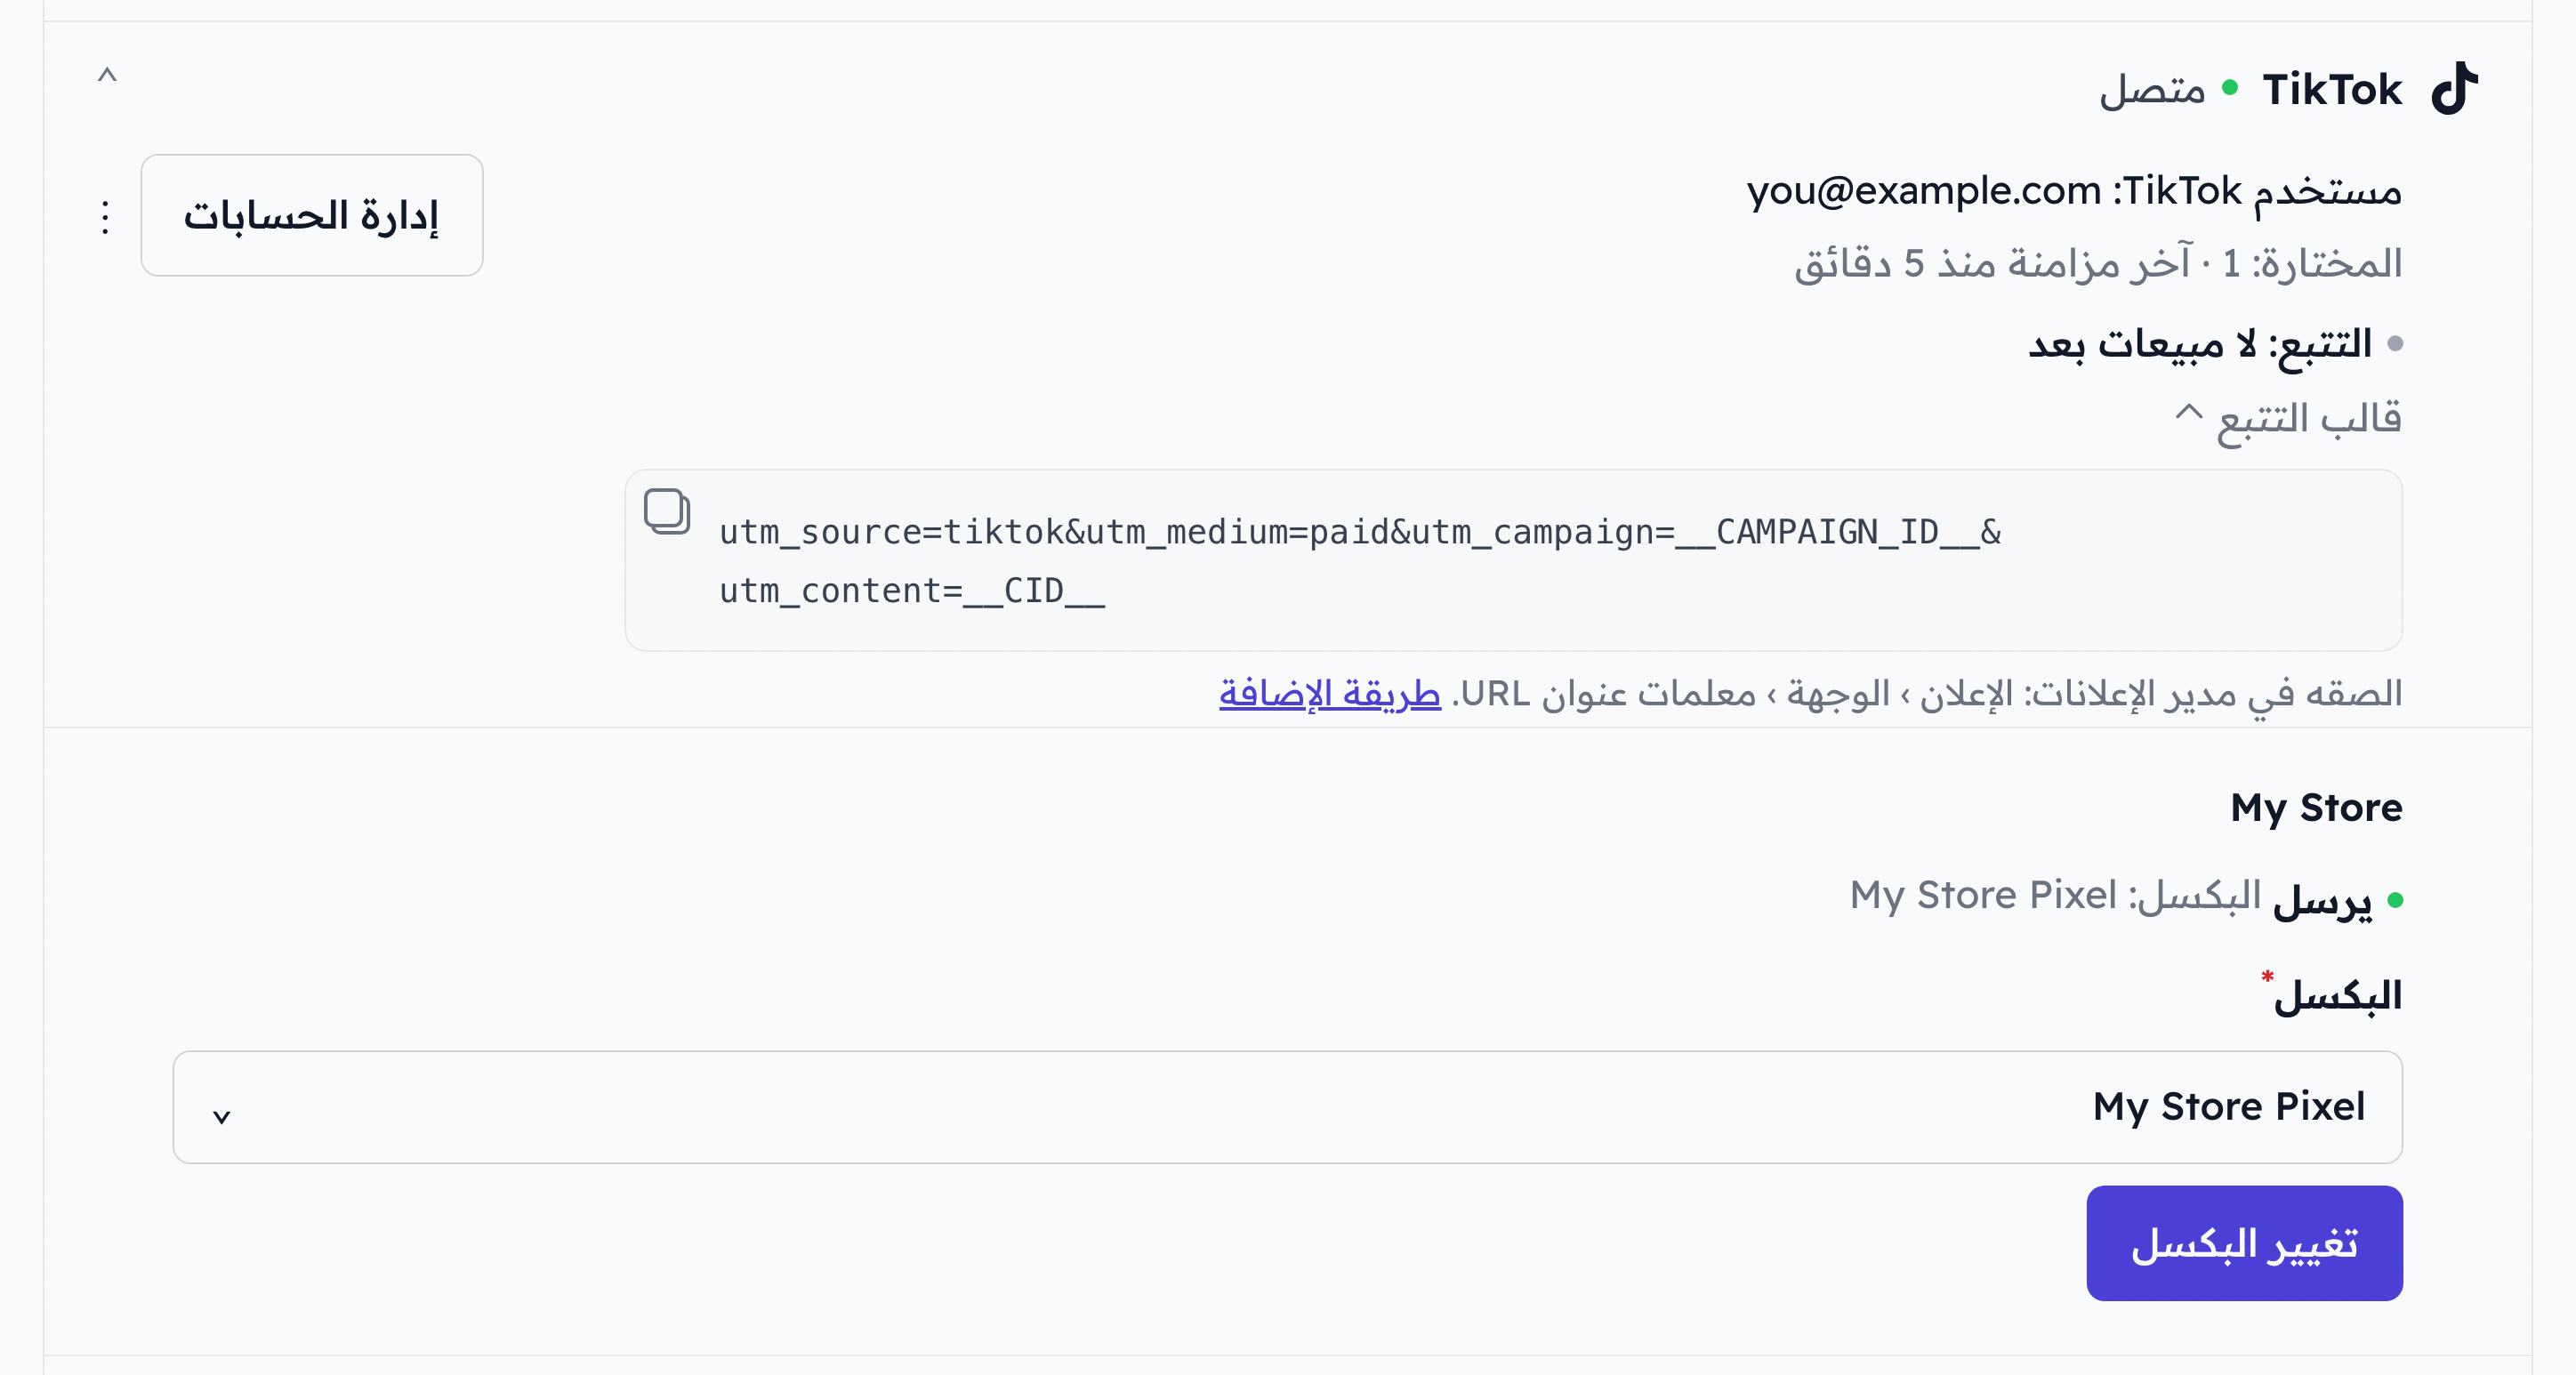
Under your TikTok login, open Tracking template. Copy the line Flowfy shows and paste it where the note under it says: Paste it in Ads Manager under Ad › Destination › URL parameters. It adds the campaign and ad IDs to every ad link, so Flowfy can tell which campaign brought each order.
Part 3 · Check that it's working
In Accounts & tracking, the account now shows Sending and Pixel: followed by the pixel's name, and the Pixel required badge is gone.
Flowfy has also added a destination named TikTok · followed by your ad account's name under Data destinations. It is managed from the ad account: you change its pixel or pause it from Ads, not there. Place a test order in your store and open that destination's Live Events tab. Your order should appear within a few seconds.
On TikTok's side, open Tools › Events in TikTok Ads Manager, select the same pixel and check its Diagnostics tab. It reports what TikTok received and flags anything malformed.
If you set up TikTok with a token before
When you enable tracking on the pixel an older, token-based destination already sends to, Flowfy takes that destination over. Nothing is duplicated, and there is no token left for you to keep safe.
If an older destination sends to a different pixel, Flowfy shows You still have a manual destination sending to another pixel with its name. Click Stop old destination once the new setup shows Sending, so the two don't report the same sales.
If something goes wrong
TikTok shows "Missing permissions", or no tracking section appears under the account. A permission was switched off at sign-in. Click Grant permissions and keep every permission switched on.
The ad account you want is not in the list. The TikTok login you used cannot reach it. Ask your Business Center admin to give that login access to the ad account, then choose Sync now from the three-dot menu on the TikTok row and tick it under Manage accounts.
Flowfy says "This pixel is already tracked by another ad account." One pixel can take events from only one of your connected ad accounts. Choose another pixel, or change the pixel on the other account first.
The account shows "Stopped — reconnect". TikTok stopped accepting Flowfy's sign-in. Click Reconnect and sign in again.
TikTok reports no server events. You are probably looking at a different pixel in TikTok from the one shown next to Pixel: in Flowfy. Open that pixel, or choose the right one and click Change pixel.
Sales are counted twice. Your browser pixel and Flowfy are sending to different pixels. Choose the pixel your website uses, click Change pixel, and stop any old manual destination.